Installing nail-down hardwood flooring over a concrete slab requires careful preparation and the construction of a suitable subfloor. This method provides a durable and aesthetically pleasing result, combining the elegance of hardwood with the stability of concrete.
Understanding the Process
Directly nailing hardwood flooring into concrete is not feasible due to the hardness of the material. Instead, a plywood subfloor is constructed over the concrete slab, creating a surface suitable for nailing down the hardwood planks.
Step-by-Step Installation Guide
- Assess and Prepare the Concrete Slab
- Moisture Testing: Use a moisture meter to ensure the concrete slab’s moisture level is within acceptable limits for wood flooring. Excess moisture can lead to warping and other issues.
- Cleaning and Leveling: Remove any debris, dust, or irregularities from the concrete surface. A clean and level slab is crucial for a successful installation.
- Install a Moisture Barrier
- Lay a polyethylene sheet or other suitable vapor barrier over the concrete to prevent moisture from reaching the wood flooring. Ensure the barrier overlaps by at least six inches and is secured in place.
- Construct the Plywood Subfloor
- Material Selection: Use a minimum of 3/4-inch (23/32-inch, 18.3 mm) CD Exposure 1 plywood sheathing in 4’ x 8’ sheets.
- Cutting and Scoring: Cut the plywood into 2’ by 8’ planks and score the backs 3/8” deep on a 12” grid. This allows for expansion and contraction.
- Placement: Lay the plywood panels in a staggered pattern with at least 2’ long planks along starting and finishing walls.
- Fastening: Secure the plywood to the concrete using appropriate fasteners, such as powder-driven pins, pneumatic-driven nails, screws, or deformed pins suitable for concrete application.
- Acclimate the Hardwood Flooring
- Place the hardwood planks in the installation area for several days to allow them to acclimate to the room’s temperature and humidity.
- Install the Hardwood Flooring
- Begin laying the hardwood planks over the plywood subfloor, securing them with nails or staples as per the manufacturer’s recommendations.
Considerations
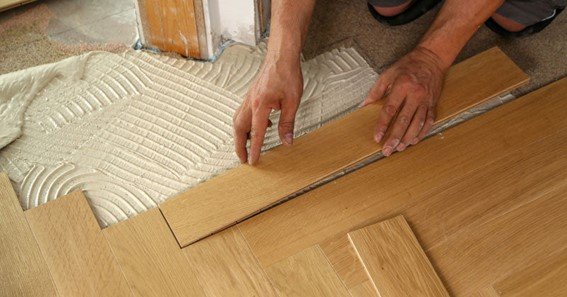
- Radiant Heat Systems: If the concrete slab contains embedded radiant heat pipes, avoid using power-actuated fasteners or concrete nails. Instead, glue the plywood planks to the plastic with asphalt mastic, spreading it using a 1/4” by 1/4” notched trowel.
- Floating Floors: As an alternative to the nail-down method, consider installing a floating engineered hardwood floor, which can be an excellent choice if your subfloor is below grade.
Conclusion
Installing nail-down hardwood flooring over a concrete slab is a meticulous process that involves constructing a plywood subfloor to provide a nailable surface. By following the steps outlined above and considering the specific conditions of your installation area, you can achieve a beautiful and durable hardwood floor that enhances the aesthetic and value of your space.
FAQ
- Can I nail hardwood flooring directly to a concrete slab?
- No, nailing directly into concrete is not feasible. A plywood subfloor must be constructed over the concrete slab to provide a suitable surface for nailing.
- What type of plywood is recommended for the subfloor?
- A minimum of 3/4-inch (23/32-inch, 18.3 mm) CD Exposure 1 plywood sheathing in 4’ x 8’ sheets is recommended.
- Is a moisture barrier necessary when installing hardwood over concrete?
- Yes, installing a moisture barrier is crucial to prevent moisture from the concrete slab from affecting the hardwood flooring.
- How long should hardwood flooring acclimate before installation?
- Hardwood flooring should acclimate in the installation area for several days to adjust to the room’s temperature and humidity.
- Can engineered hardwood be installed over a concrete slab?
- Yes, engineered hardwood can be installed over a concrete slab, often using the glue-down method or as a floating floor.